


This card was inspired by a design by Elena Roussakis from way back in spring 2022. I loved how she used the Tiny Gift Box Goat and Llama Add On to make a very fluffy sheep. I hadn’t been exactly sure how she put it together but when I needed to send a sympathy card quickly, I decided to take on the challenge of figuring it out. (Thank you for the design inspiration Elena! Now you don’t have to find time to make a tutorial! 😊)
Here are the steps I took to create the sheep:
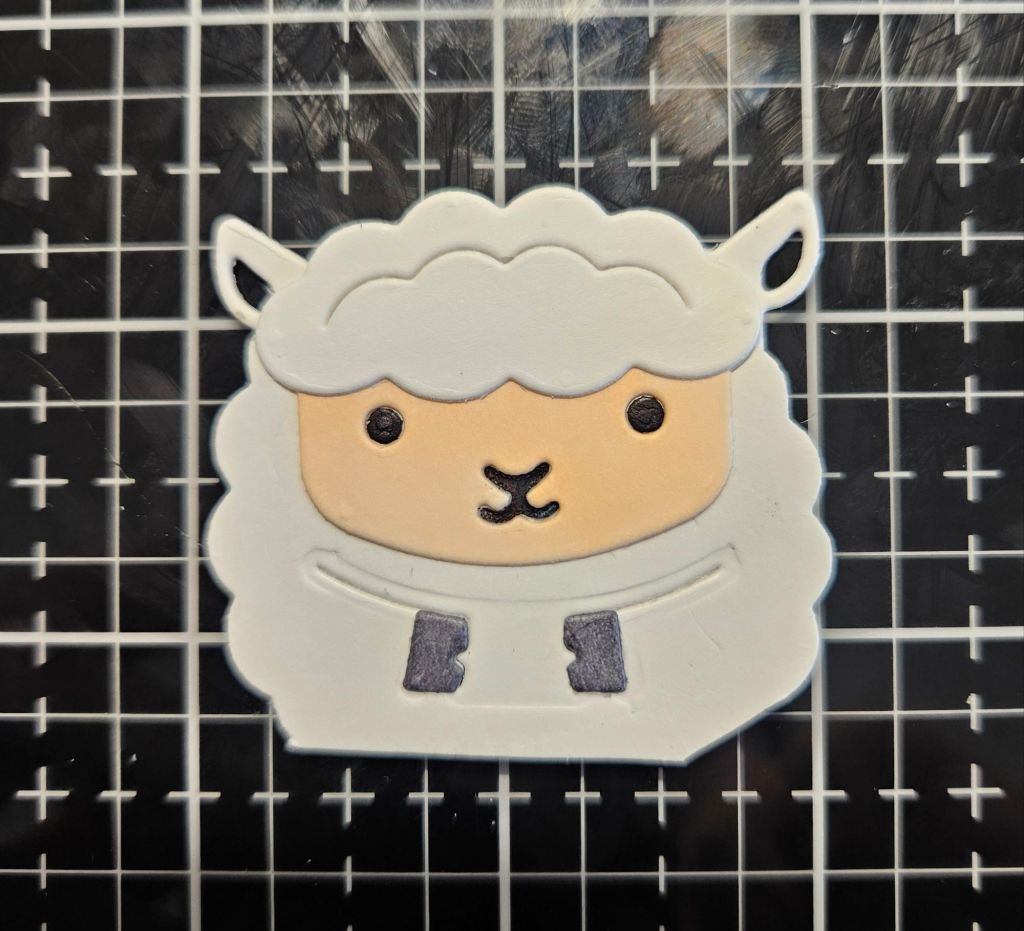
(You will need: 2 fluffy hair pieces, 1 face piece, 1 full head piece, the 2 hooves, and the body piece that we will create below)
1. Use the fluffy hair die and partially die cut it so that it only cuts about halfway through. (See the picture below, on the right.)
2. Take the full head piece (this is the one with the ears, in the shape of the square box) and lay it down next to your partial die cut so that you have an idea how wide the body needs to be. Place the fluffy hair die across from your first partial die cut at about the width of the full head piece. (See the picture below, on the left.)
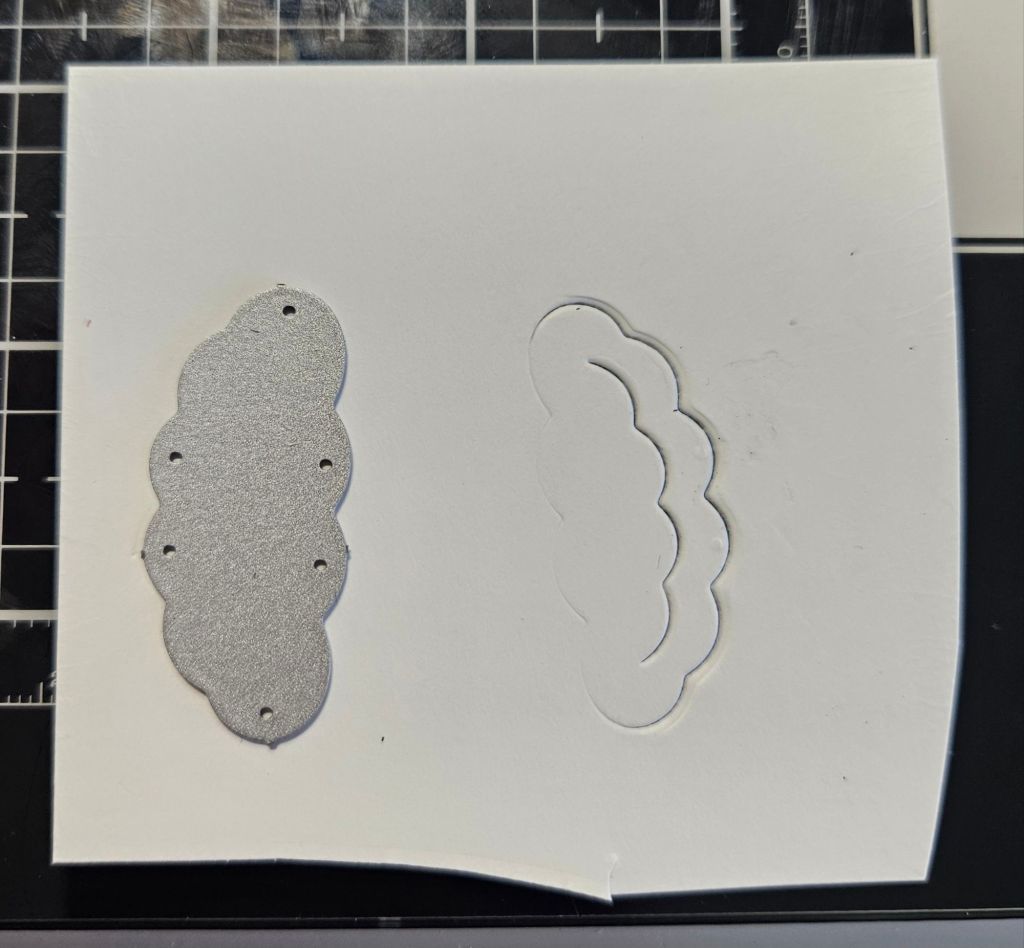
3. Make another partial die cut, stopping about halfway through again. You should end up with two partial die cuts that are directly across from each other. These are the 2 sides of the sheep body.

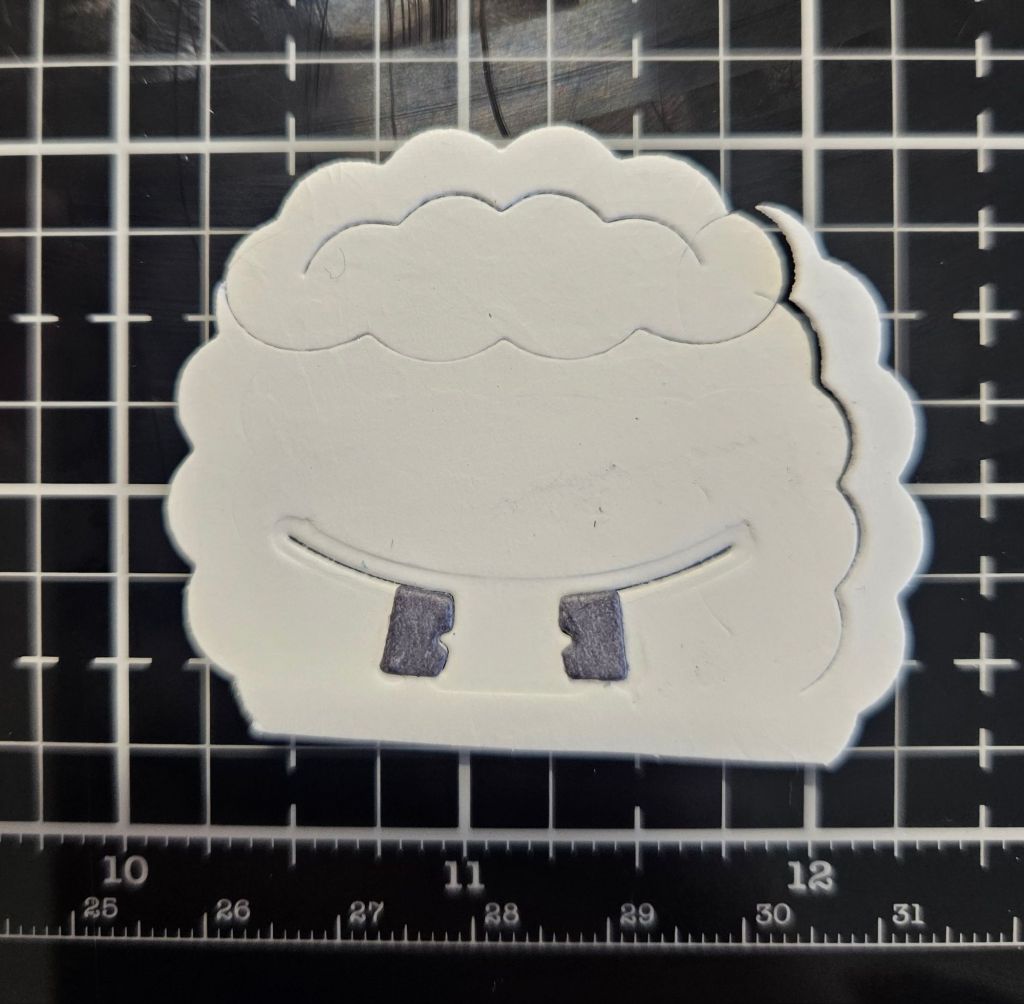
4. Take the fluffy hair piece and place it at the top of these two cuts. This will form the top of the body. Do another partial die cut, stopping about 3/4 of the way through.

5. You should now have the general shape of the sheep body, with two fluffy sides and a fluffy top. Don’t worry about any mistake areas, since they will be covered up later.

6. Take the die that cuts out the arms/hands and cut them out from the body piece. Attach the hooves.
Make sure to line up the arms straight across with the top of the head. (I didn’t do this perfectly, as you can see in the picture below.) You can see that the overall piece of cardstock I was working with was a little uneven in shape but that won’t show later. The more important thing is to have the arms straight with the top of the head.
7. Take the full head piece again (pictured below.)

8. Place the full head piece with the ears behind the body piece, and glue them together.
I had that extra piece of fluff on the right that was hanging on by a thread so I removed it, and it worked out just fine.

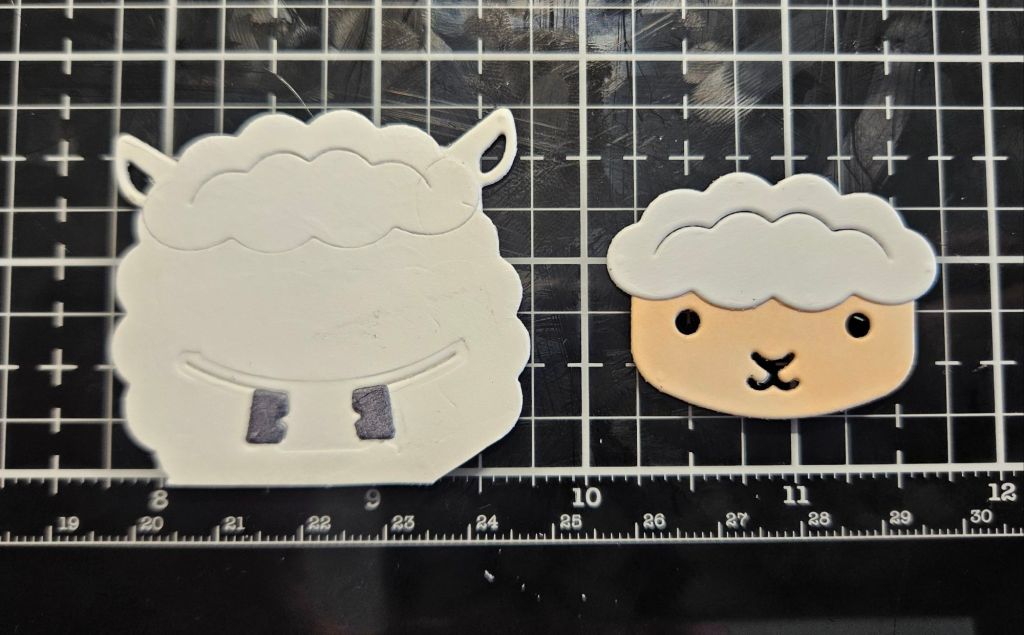
9. You should now have the body piece with the ears attached and the arms cut out with the hooves attached.

10. Take one of the fluffy hair pieces and attach it to the face piece.
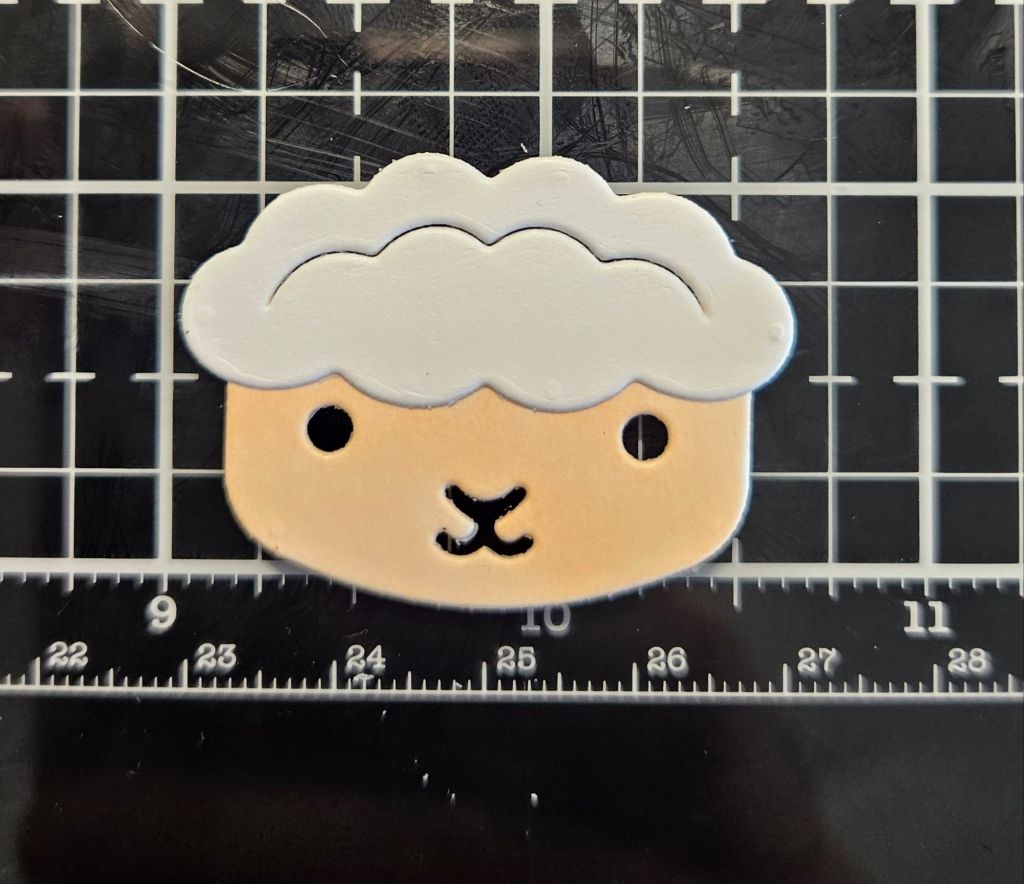
11. You should now have a body piece and a face piece with fluffy hair.
12. Attach the face piece to the body piece. Try to line up the fluffy hair on the top with the piece below it as much as possible.

13. Inlay the pieces for the eyes and mouth.
14. Turn everything over to the back side. Add scrap pieces of paper behind the ears so that you’ll have a base that you can then inlay pieces into.
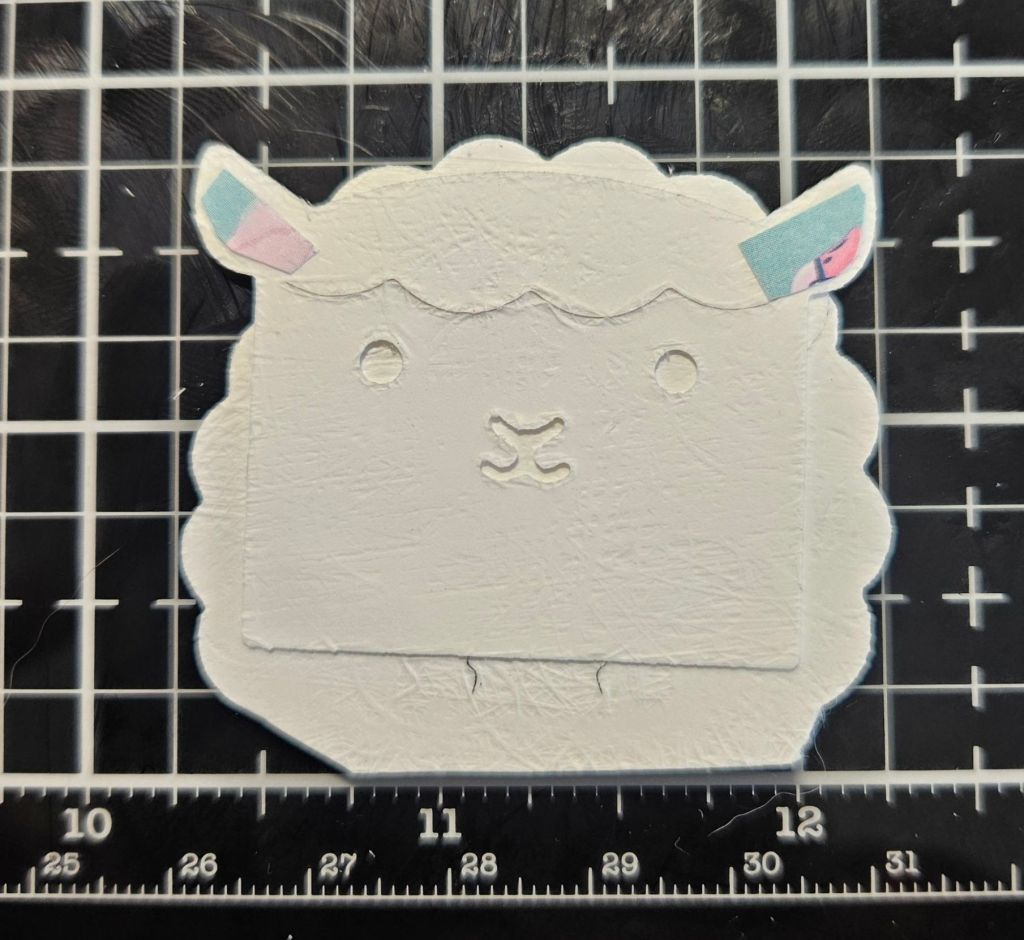
15. Inlay the pieces for the insides of the ears.

16. Take the second fluffy hair piece you cut out and attach it behind everything. It should be in line with the fluffy hair on the top of the head but raised up higher, to give the sheep just a little extra fluff and volume. (It might be a little hard to see in the picture below but it does make a difference!)

17. And finally, tuck a flower into the arm for the sheep to hold!

And once again, the final card:

Since the sheep ends up tucked into the circle, you don’t really see any of the bottom of the construction of the body. And the fluffy hair piece hides where the other partial die cuts were.
I like having this as a square card. I was trying to keep the circle mostly centered on the card but I think if I made this again I would move it up even more so that the letters at the bottom could lay fully flat. I also think I would use one smaller size square so that more of that beautiful plaid border would show through on the edges. And of course, I would definitely use the same paper for the circle frame so that the white colors matched, instead of being slightly different. 😄
Materials used:
- Large Stitched Square Stackables
- Perfectly Plaid Spring petite paper pack (retired)
- Outside In Stitched Square Stackables
- Stitched Circle Frames
- Shimmer cardstock pastel
- Oliver’s Stitched ABC’s
- Simple Wavy Banners
- Smooth Sailing (for the sentiment)
- Tiny Gift Box Goat and Llama Add On
- Build A Basket Easter (for the flower and bow)

That is so cute!
LikeLike